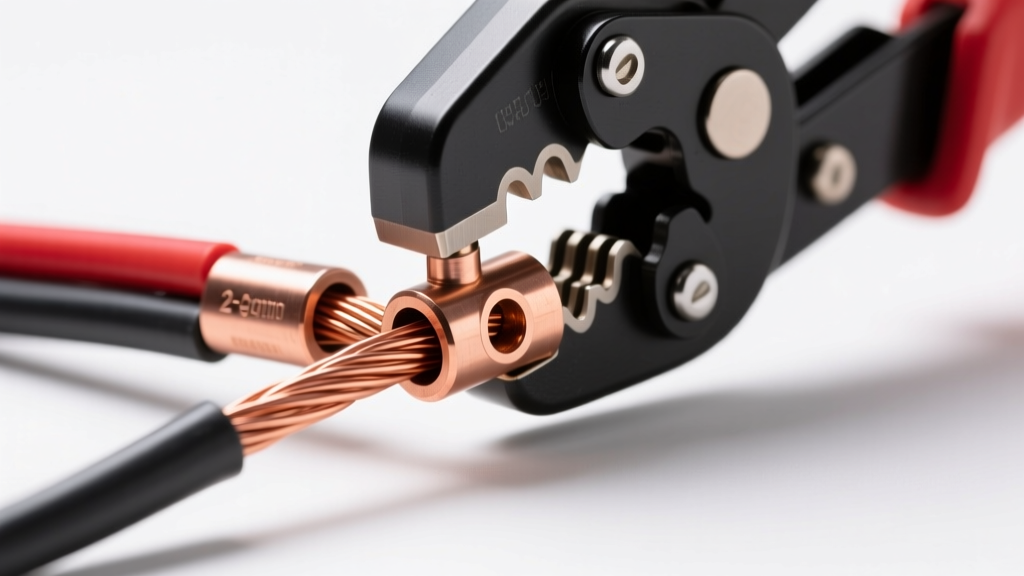
Introduction to High-Amp Automotive Terminations
Upgrading to a high-output alternator, relocating the battery to the trunk for weight distribution, or simply replacing heavily corroded factory battery cables requires a solid understanding of heavy-gauge wiring. For circuits carrying 150 to 200 amps, 2 AWG (American Wire Gauge) copper wire is the automotive standard. However, the wire itself is only half the battle. The termination point—specifically, the 2 gauge wire lugs—is where most DIY electrical failures occur. A poorly crimped lug creates high electrical resistance, leading to voltage drop, excessive heat, and eventually, a melted terminal or a vehicle that refuses to crank.
This beginner-friendly guide will walk you through the fundamentals of selecting, crimping, and installing 2 AWG lugs to ensure a factory-grade, high-current connection that withstands the harsh under-hood environment.
Understanding 2 AWG Wire and Lug Sizing
Before cutting any wire, it is crucial to understand the physical and electrical properties of the materials you are working with. According to SAE J1128 standards for low-tension primary automotive cable, 2 AWG wire is designed to handle massive current loads over short chassis distances. The lug you select must perfectly match the wire's outer diameter (OD) and the vehicle's mounting stud size.
| Specification | Metric | Imperial / Notes |
|---|---|---|
| Cross-Sectional Area | 33.6 mm² | Equivalent to 665 strands of 30 AWG copper |
| Nominal Wire OD (with insulation) | 10.5 mm - 11.5 mm | Varies by insulation type (SGT vs. SGX) |
| Maximum Ampacity (Chassis Wiring) | N/A | 150A - 200A (Short runs under 10 feet) |
| Standard Ring Stud Sizes | M8 / M10 | 5/16-inch (GM/Chrysler) or 3/8-inch (Ford/Starters) |
| Required Heat Shrink Size | 9.5 mm or 12.7 mm | 3/8-inch or 1/2-inch Adhesive-Lined |
Choosing the Right 2 Gauge Wire Lugs
When shopping for 2 gauge wire lugs, you will encounter two main styles: open barrel and closed barrel. For heavy-gauge automotive battery and starter cables, closed barrel copper tube lugs are mandatory. These lugs are formed from a seamless copper tube that is flattened and stamped at the ring end. They provide 360-degree compression around the wire strands, ensuring maximum surface area contact and superior mechanical pull-out strength.
Always opt for tinned copper lugs. Bare copper oxidizes rapidly in the presence of moisture and road salt, creating a green, powdery corrosion (copper sulfate) that acts as an insulator, choking off current flow to your starter motor.
Essential Tools for a Factory-Grade Crimp
Beginners often attempt to crush heavy lugs using Vise-Grips, a bench vise, or a hammer. This creates internal voids and uneven compression, leading to high resistance. To do the job correctly, you need the right tools:
- Heavy-Duty Wire Strippers or a Sharp Utility Knife: Standard automatic strippers will jam on 2 AWG wire. A specialized heavy-gauge stripper or a careful scoring-and-peeling method with a razor blade is required.
- Hex-Indent Crimper or Hammer Crimper: A hydraulic hex crimper is the professional standard, compressing the lug into a perfect hexagon. For beginners on a budget, a heavy-duty hammer crimper (which uses a punch and die set struck with a 3 lb mallet) is an excellent, cost-effective alternative that yields highly reliable results.
- Adhesive-Lined Heat Shrink: Standard electrical tape is strictly prohibited for under-hood battery cables. You must use 3/8-inch or 1/2-inch dual-wall, adhesive-lined heat shrink to seal the lug barrel against moisture intrusion.
Step-by-Step Crimping and Installation Guide
Step 1: Measure and Strip the Insulation
Measure the depth of the lug barrel. Mark the 2 AWG wire's insulation at that exact depth. Carefully score the insulation around the circumference, being extremely careful not to nick the underlying copper strands. A nicked strand creates a stress riser that can snap under engine vibration. Peel the insulation back and twist the bare strands tightly clockwise to keep them bundled.
Step 2: Seat the Wire in the Lug
Slide the adhesive-lined heat shrink onto the wire before inserting the wire into the lug. Push the twisted 2 AWG wire deep into the closed barrel of the lug. Tap the ring end of the lug against your workbench to ensure the wire is fully seated at the bottom of the barrel. No bare copper should be visible between the insulation and the crimp zone, and no strands should poke through the inspection hole at the top of the ring.
Step 3: Execute the Crimp
If using a hex crimper, select the 2 AWG die (typically 11mm). Position the jaws squarely over the barrel, avoiding the ring and the insulation. Squeeze the handles firmly. If using a hammer crimper, place the lug in the correct die cavity, align the punch, and strike it squarely with a heavy mallet. Perform a second crimp closer to the insulation end if the barrel is long enough, ensuring a uniform deformation.
Step 4: Seal and Protect
Slide the adhesive-lined heat shrink up so that it covers the last 1/4 inch of the wire insulation and extends halfway up the flattened ring shank. Apply heat evenly with a heat gun until the shrink is tight and the internal adhesive melts and oozes slightly out of the ends. This creates a waterproof, vibration-proof seal.
Routing, Torque, and Anti-Corrosion Protocols
Even a perfectly crimped 2 gauge wire lug will fail if the mechanical connection to the vehicle's chassis or starter is loose. The mating surfaces must be cleaned down to bare, shiny metal using a wire brush or sandpaper. After tightening, apply a small dab of dielectric grease or a conductive anti-oxidant compound (like No-Ox) over the exposed terminal edges to prevent future corrosion.
| Terminal Stud Size | Common Application | Torque Specification (ft-lbs) |
|---|---|---|
| 5/16-inch (M8) | GM/Chrysler Battery Posts, Chassis Grounds | 9 - 12 ft-lbs |
| 3/8-inch (M10) | Ford Battery Posts, Starter Solenoids, Alternator B+ | 15 - 20 ft-lbs |
Troubleshooting Common Lug Failures
If your vehicle experiences electrical gremlins after a cable upgrade, consult this decision tree to identify the failure mode.
| Symptom | Root Cause | Corrective Action |
|---|---|---|
| Starter clicks once, then dash lights dim completely. | High resistance at the lug crimp due to voids or loose compression. | Cut off the lug and re-crimp using a properly sized hex or hammer die. |
| Heat shrink is melted or discolored near the ring terminal. | Loose mounting stud torque causing arcing, or undersized wire for the load. | Clean mating surfaces, torque to spec, and verify alternator/starter amp draw. |
| Green crusty buildup inside the heat shrink. | Moisture intrusion due to using non-adhesive heat shrink or electrical tape. | Remove terminal, clean with baking soda/water, reseal with adhesive-lined shrink. |
Final Thoughts
Working with heavy-gauge automotive wiring is highly rewarding and vastly improves the reliability of your vehicle's electrical system. By respecting the physics of high-amperage circuits, utilizing proper closed-barrel 2 gauge wire lugs, and executing a sealed, properly torqued crimp, you will build a battery cable assembly that rivals or exceeds OEM quality. For further reading on automotive electrical best practices and alternator upgrade wiring diagrams, consult the technical archives at Mad Electrical or reference standard automotive repair manuals from Haynes.