What Gauge is Lamp Wire? The Core Automotive Standard
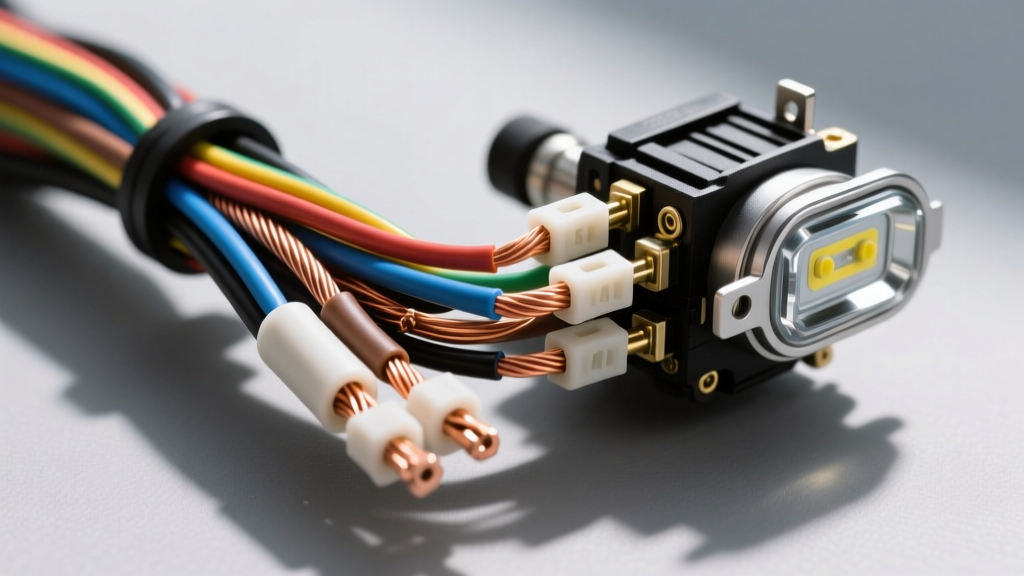
When technicians and DIYers ask, "what gauge is lamp wire," the answer is never a single number. Automotive lighting circuits are divided by current draw, bulb technology, and physical routing constraints. As a baseline rule dictated by SAE J1128 wiring standards, standard low-draw circuits (tail lights, interior dome lights, license plate lamps) utilize 18 AWG wire. However, high-draw forward lighting (halogen H11 low beams, 9005/HB3 high beams) requires 14 AWG or 12 AWG wire to prevent severe voltage drop, premature bulb failure, and melted connector pigtails.
If you are diagnosing dim headlights, flickering LED retrofits, or burning smells from the headlamp harness, the root cause often traces back to undersized factory wiring or degraded copper strands. This step-by-step troubleshooting flow will help you isolate gauge-related failures, verify circuit amperage, and execute a permanent repair.
Phase 1: Symptom Isolation & Decision Tree
Before cutting into the harness, map your symptoms to common wire gauge and circuit resistance failures. Use this diagnostic decision tree to pinpoint the fault:
- Symptom: Halogen low beams are dim, but high beams are bright.
Diagnosis: The low beam circuit (often shared or routed through a thin factory 16 AWG wire) is suffering from voltage drop. Common in 2007-2013 GM Silverado/Sierra trucks with H11 bulbs. - Symptom: Headlight connector is melted at the ground pin.
Diagnosis: The wire gauge is too small for the amperage, or the copper strands have corroded, increasing resistance. The ground wire (often 16 or 18 AWG from the factory) is acting as a heater element instead of a conductor. - Symptom: LED tail lights flicker when the brake pedal is pressed.
Diagnosis: Insufficient gauge on the shared 1157 dual-filament circuit, or a poor ground causing a back-feed through the 18 AWG parking light wire. - Symptom: Blown headlight fuses immediately upon installation of higher-wattage off-road bulbs.
Diagnosis: Exceeding the ampacity of the factory 14 AWG lamp wire. The wire cannot dissipate the heat generated by a 100W bulb drawing 8.3+ amps.
Phase 2: Verify Amperage vs. Wire Gauge Specifications
To accurately answer what gauge is lamp wire for your specific application, you must calculate the continuous current draw. According to AutoShop 101 electrical troubleshooting guides, a 12V automotive circuit should never be loaded to more than 80% of the wire's maximum ampacity to account for under-hood heat and voltage drop over distance.
| Bulb Type / Application | Wattage | Amp Draw (@ 13.5V) | Minimum Factory AWG | Recommended Upgrade AWG |
|---|---|---|---|---|
| H11 Halogen Low Beam | 55W | 4.1A | 16 AWG | 14 AWG |
| 9005 (HB3) High Beam | 65W | 4.8A | 14 AWG | 12 AWG |
| H4 (9003) Dual Beam | 60/55W | 4.5A / 4.1A | 14 AWG | 12 AWG (w/ Relay) |
| 1157 Tail/Brake Light | 8/27W | 0.6A / 2.0A | 18 AWG | 16 AWG |
| LED H11 Retrofit | 25W | 1.8A | 18 AWG | 18 AWG (Sufficient) |
| Interior Dome/Courtesy | 10W (168/194) | 0.7A | 20 AWG | 18 AWG |
Phase 3: Perform a Voltage Drop Test (The Proof)
Visual inspection cannot confirm if a wire gauge is sufficient or if internal copper corrosion is mimicking an undersized wire. You must perform a dynamic voltage drop test under load. A healthy automotive lighting circuit should exhibit less than 0.5V drop total across the entire power and ground loop.
- Prepare the DMM: Set your digital multimeter to DC Volts. Ensure the vehicle engine is running to simulate alternator output (approx. 13.8V - 14.2V).
- Test the Power Side: Turn on the low beam headlights. Place the DMM red probe directly on the battery positive terminal. Pierce the 12V supply wire at the back of the headlight connector (e.g., the Yellow wire on a GM H11 pigtail) with the black probe. Reading over 0.3V indicates the power wire gauge is too small or the factory relay contacts are burnt.
- Test the Ground Side: Place the DMM red probe on the ground pin of the headlight connector (e.g., the Black wire on GM, Black/Light Green on Ford). Place the black probe directly on the battery negative terminal. Reading over 0.2V indicates an undersized ground wire or a corroded chassis ground point.
- Calculate the Loss: If your battery is at 14.0V, but the headlight pins only show 12.2V under load, you are losing 1.8V to circuit resistance. This massive drop confirms the factory wire gauge is inadequate for the halogen current draw.
Phase 4: Connector & Pin Diagnostics
When factory engineers marginally size lamp wire to save weight and copper costs, the weakest link becomes the connector terminal. The Painless Performance wiring manuals frequently highlight how undersized wires fail at the crimp barrel before the wire itself melts.
- H4 (9003) Ground Pin Burnout: The H4 connector relies on a single ground pin to handle the return current for both the 55W low beam and 60W high beam. If the factory used 16 AWG wire, the terminal will overheat, oxidize, and eventually melt the plastic housing. Fix: Upgrade to a ceramic H4 pigtail with 12 AWG GXL wire.
- H11 / H7 Locking Tab Failure: High resistance causes thermal expansion and contraction. Over time, the female terminal loses its grip on the male bulb spade. This causes micro-arcing. If you see black soot inside the H11 connector, the wire gauge is bottlenecking current, causing localized heat.
- LED CANBUS Errors: If you upgrade to LEDs, the lower amp draw of 18 AWG wire is perfectly fine. However, if the factory wiring relies on the resistance of a long, thin 18 AWG run to monitor bulb outages, you may need to install load resistors (which require 14 AWG tap wires to handle the generated heat).
Phase 5: Execute the Repair (Upgrading the Gauge)
Once you have confirmed via voltage drop testing that the factory wire gauge is insufficient, you must bypass or replace the harness using automotive-grade materials. Never use household PVC THHN wire; it lacks the chemical resistance to survive under-hood fluids and heat.
Selecting the Right Wire Spec
Always use SAE J1128 GXL or TXL cross-linked polyethylene wire. GXL has a thicker insulation wall for rugged routing through firewalls and frame rails, while TXL has a thinner wall for tight spaces inside headlight housings. Both are rated for 125°C continuous operation, vastly outperforming standard PVC.
The Relay Harness Upgrade (For High-Draw Halogens)
If you are running 85W or 100W off-road halogen bulbs, standard 14 AWG lamp wire will overheat. You must install a relay harness:
- Run 10 AWG wire directly from the battery positive to a 40A automotive relay (Pin 30).
- Run 10 AWG from the relay output (Pin 87) to the headlight power pins.
- Use the factory headlight plug merely as a trigger signal. Splice into the factory 16 AWG power wire to activate the relay coil (Pin 86). This pulls less than 0.2A, entirely eliminating voltage drop on the factory lamp wire.
- Ground the relay coil (Pin 85) and the headlight ground wires using 12 AWG wire to a clean, bare-metal chassis point, secured with a star washer and anti-corrosion dielectric grease.
Summary: Matching Gauge to the Load
Answering "what gauge is lamp wire" requires looking past the factory service manual and analyzing real-world circuit behavior. While 18 AWG is standard for marker and interior lights, 14 AWG and 12 AWG are mandatory for reliable, bright forward lighting. By utilizing the voltage drop testing flow and upgrading to SAE J1128 GXL wire, you eliminate the thermal bottlenecks that cause dim lights and melted connectors, ensuring your vehicle's electrical system operates safely and efficiently.