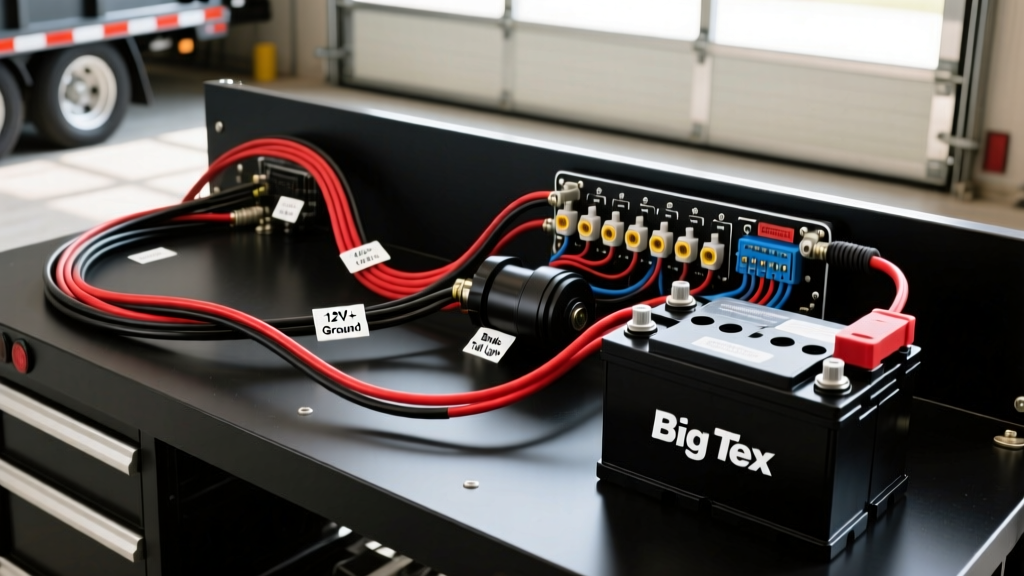
Understanding the Big Tex Dump Trailer Battery Wiring Diagram
Wiring a dump trailer requires a fundamentally different approach than wiring a standard flatbed or enclosed cargo trailer. When analyzing a Big Tex dump trailer battery wiring diagram (common on models like the 14LP, 16ET, and 20ET), you are dealing with high-amperage hydraulic pump motors that can draw upwards of 250 amps under peak load. The standard 7-way RV plug from your tow vehicle cannot supply this current. Instead, the trailer relies on an onboard deep-cycle battery to operate the dump bed, while the tow vehicle merely provides a maintenance charge to keep that battery topped off between uses.
A proper Big Tex electrical system is divided into three distinct circuits: the Tow Vehicle Charge Circuit, the High-Amperage Hydraulic Pump Circuit, and the Emergency Breakaway Circuit. Misrouting these circuits, undersizing the wire gauge, or relying on the trailer frame for high-current grounding will result in severe voltage drop, stalled hydraulic pumps, and potentially catastrophic brake failures during a breakaway event. This practical installation guide details the exact AWG specifications, pin configurations, and routing methods required to build or repair a factory-grade dump trailer electrical system.
The 7-Way RV Connector: Power Distribution & Pinout
The interface between your truck and the Big Tex trailer is the 7-way RV blade connector. According to standard etrailer and RVIA wiring guidelines, the pinout is standardized, but the wire gauge used on the trailer side of Pin 7 is where most aftermarket setups fail. The factory 12V auxiliary wire on many trailers is a measly 12 AWG, which is entirely insufficient for charging a depleted Group 27 deep-cycle battery over a 25-foot run.
Standard 7-Way RV Blade Pin Configuration
| Pin | Function | Standard Wire Color | Big Tex Dump Trailer Application |
|---|---|---|---|
| 1 | Left Turn / Stop | Yellow | Standard lighting circuit (14 AWG) |
| 2 | Reverse Lights | Purple | Reverse lights / Backup alarm (14 AWG) |
| 3 | Ground | White | Main lighting ground (10 AWG minimum) |
| 4 | Right Turn / Stop | Green | Standard lighting circuit (14 AWG) |
| 5 | Electric Brakes | Blue | Brake controller output (10 AWG) |
| 6 | Tail / Running Lights | Brown | Marker and clearance lights (14 AWG) |
| 7 | 12V Auxiliary / Charge | Black or Red | Battery Charge Wire (8 AWG Required) |
Step-by-Step Installation Guide
Step 1: Routing the Main Charge Wire (Circuit 1)
The charge wire originates at Pin 7 of the 7-way plug and routes through the A-frame tongue to the front-mounted poly toolbox where the battery resides. To prevent voltage drop and ensure the tow vehicle's alternator can effectively charge the trailer battery, you must upgrade this wire to 8 AWG stranded copper (meeting SAE J1128 specifications).
Installation Steps:
- Run the 8 AWG black or red wire through the interior of the Big Tex A-frame tongue to protect it from road debris and hydraulic fluid leaks.
- Install a 30A auto-reset circuit breaker or a 30A MAXI-fuse within 18 inches of the battery positive terminal. This protects the wire in the event of a dead short against the steel frame.
- Terminate the wire at the battery positive post using a marine-grade, adhesive-lined heat-shrink ring terminal. Do not use open-end forks, as vibration from the dump bed operation will shake them loose.
Step 2: Wiring the Hydraulic Pump Motor (Circuit 2)
Most Big Tex dump trailers utilize a KTI, Monarch, or Tommy Gate 12V DC hydraulic power unit. These motors draw between 150A and 250A depending on the payload weight. Wiring this circuit requires heavy-duty battery cable and a continuous-duty solenoid.
Component Specifications:
- Wire Gauge: 4 AWG or 2 AWG stranded welding cable or SAE J1111 battery cable.
- Solenoid: Trombetta 12V Continuous Duty Solenoid (e.g., Part #974-1215-011) or a Cole Hersee 24059. Standard automotive starter relays will melt under the continuous 3-minute draw required to raise a fully loaded bed.
- Overcurrent Protection: 150A or 200A ANL fuse installed on the main positive feed from the battery to the solenoid.
Routing: Connect the 4 AWG positive cable from the battery positive post (after the ANL fuse) to the large input stud on the solenoid. Run a second 4 AWG cable from the solenoid's output stud directly to the positive terminal on the hydraulic pump motor. The pump motor is typically grounded through its metal casing to the mounting bracket, but for maximum reliability, install a dedicated 4 AWG ground wire from the pump casing bolt directly to the battery negative terminal.
Step 3: Integrating the Breakaway Switch (Circuit 3)
The breakaway switch is a critical DOT-mandated safety device. If the trailer separates from the hitch, the lanyard pulls the pin, engaging the electric brakes using the onboard battery.
Critical Safety Warning: The breakaway switch MUST be wired directly to the battery positive terminal, completely independent of the main battery disconnect switch or the charge wire solenoid. A common and dangerous mistake is wiring the breakaway switch to the load side of the main battery cutoff. If the operator turns off the battery disconnect for storage and forgets to turn it back on before towing, a breakaway event will result in zero braking power. Use 12 AWG wire, route it through a protective loom, and connect it to the positive battery post alongside the main charge wire.
Critical Grounding Practices for Dump Trailers
According to Curt Manufacturing's trailer wiring diagnostics, over 80% of trailer electrical failures are ground-related. On a dump trailer, this risk is magnified. The dump bed pivots on heavy steel hinges, and the hydraulic cylinder connects the bed to the frame. However, these pivot points are packed with grease, painted with powder coat, and subjected to extreme torque. You cannot rely on the trailer frame or the bed hinges as an electrical ground.
The Star-Washer Grounding Method:
- Locate a solid section of the main Big Tex frame rail near the battery box and the rear axle.
- Use a wire wheel or sandpaper to grind away all powder coat, paint, and rust down to bare, shiny steel.
- Attach your ground ring terminal (White 10 AWG for lights, 4 AWG for the pump motor) using a Grade 8 bolt.
- Place a steel star washer between the ring terminal and the bare metal frame. The teeth of the star washer will bite into the copper and the steel, creating a vibration-proof, gas-tight connection.
- Coat the entire connection in dielectric grease or fluid film to prevent galvanic corrosion and rust creep.
Troubleshooting Common Voltage Drop Issues
If your Big Tex dump trailer hydraulic pump is moving slowly, stalling halfway up, or clicking repeatedly, you are likely experiencing severe voltage drop. Deep cycle batteries, such as those documented in Trojan Battery's maintenance guides, require proper voltage to sustain high amperage output.
Symptom-Cause-Fix Decision Tree
- Symptom: Pump clicks rapidly but bed does not move.
Cause: Solenoid is engaging, but voltage at the pump motor drops below 9V under load. Usually caused by undersized wire (e.g., using 8 AWG instead of 4 AWG) or a corroded frame ground.
Fix: Perform a voltage drop test. Place your multimeter's red probe on the battery positive post and the black probe on the pump motor positive terminal while the bed is raising. If the reading shows more than 0.5V drop, replace the cable. Repeat on the ground side. - Symptom: Battery drains completely flat after 3 days of non-use.
Cause: Parasitic draw from the breakaway switch (if pin is partially pulled) or a faulty Trombetta solenoid that has welded its internal contacts shut, keeping the pump motor energized.
Fix: Disconnect the main ANL fuse. Use a multimeter in series with the battery negative to measure parasitic draw. If draw exceeds 50mA with the switch off, replace the solenoid. - Symptom: Tow vehicle blows the 30A charge fuse immediately upon plugging in the 7-way.
Cause: The trailer battery is deeply sulfated or has a dead shorted cell, causing it to pull unlimited amperage from the truck's alternator.
Fix: Load-test the trailer battery. If it fails, replace it. Never use a standard automotive cranking battery in a dump trailer; always use a Marine/RV Deep Cycle battery (Group 24 or 27) designed for sustained, high-amperage discharge and slow recharging.
Summary Reference: Wire Gauge and Fuse Sizing Chart
| Circuit Application | Minimum AWG Size | Recommended AWG Size | Overcurrent Protection | Terminal Type |
|---|---|---|---|---|
| 7-Way to Battery Charge | 10 AWG | 8 AWG | 30A Auto-Reset Breaker | Adhesive Heat-Shrink Ring |
| Battery to Solenoid Feed | 4 AWG | 2 AWG | 150A - 200A ANL Fuse | Heavy-Duty Copper Lug |
| Solenoid to Pump Motor | 4 AWG | 2 AWG | N/A (Protected by ANL) | Heavy-Duty Copper Lug |
| Electric Brake Feed (Pin 5) | 12 AWG | 10 AWG | 20A - 30A Maxi-Fuse | Butt Splice / Heat Shrink |
| Breakaway Switch Feed | 14 AWG | 12 AWG | None (Direct to Battery) | Adhesive Heat-Shrink Ring |
| Lighting Ground (Pin 3) | 12 AWG | 10 AWG | N/A | Star Washer to Bare Frame |
By adhering strictly to these AWG requirements, utilizing continuous-duty solenoids, and executing bare-metal star-washer grounding techniques, your Big Tex dump trailer will maintain reliable hydraulic operation and safe braking performance for years to come. Always disconnect the main battery negative cable before performing any cutting, crimping, or welding on the trailer frame to prevent accidental short circuits through the hydraulic pump casing.